Thursday, 19 June 2014

Revit License Manager Problem

We have just resolved a problem with or license manager for Revit (FlexLM). The trouble started when we were upgrading the License manager to incorporate 2015. When the ‘Path to the license file’ was specified and the service was restarted the program fell over and refused to issue any more licenses. A little bit of panic ensued as we had users waiting use Revit!!!


After a bit of trial and error, the problem was that the license file path that was specified was on a mapped network drive, the path had to be direct to the file rather than through the networked drive. Pretty strange because the pathing used for the 2014 license file was through the mapped drive…..

Hopefully this may help somebody if they have the problem in the future.

Tuesday, 10 June 2014

Constraining and Deleting

In Revit we can we can apply constraints (padlocks and EQ) using dimensions, which are very helpful in our modelling process. These constraining dimensions can be applied and then deleted, and even though they are no longer visible their constraints remain intact.

There is an important warning message box that appears that most users ignore. 


If you read the dialog box carefully it tells you that even though the dimension is being deleted the elements will remain constrained. If you want to remove the constraints then hit the Unconstrain button in the bottom right corner. If you would like to keep the constraints then there is no point deleting the dimensions in the first place.

Reading the warning dialog may just save someone a bit of investigation work down the track.

Scheduling with 2 Lines

If you have a Schedule and would like to have some of the information in the fields spread over 2 lines.


You can force Revit to put information on another line, where you define the break. Go to the schedule view and pick where you would like the text to be broken and hit ‘Shift + Enter’.

If you need to edit the information that is spread over 2 lines, you will have to do that in the schedule view or by going to the properties of the element and editing the parameter by picking the field and using the right arrow button to get to the information on the second line. 


Monday, 12 May 2014

Quick Access Toolbar

Having the tools you use on a regular basis in a quick and easy location is important to a streamlined production process. If you like using the visual tool icons rather than keyboard shortcuts, then the quick access toolbar could be your answer.


If you right click on a tool you use quite regularly will see the option to you can ‘Add to Quick Access Toolbar’. This will add the icon to the Quick access toolbar above. (To remove a tool from the Quick Access toolbar, just right click on the tool in the toolbar and you will have the option to remove.)


If you would like to show the Quick Access toolbar below the ribbon, just select the down arrow on the right hand side of the toolbar and you will notice there is an option to ‘Show Below the Ribbon’ 


Wednesday, 7 May 2014

Splitting Views using View Breaks

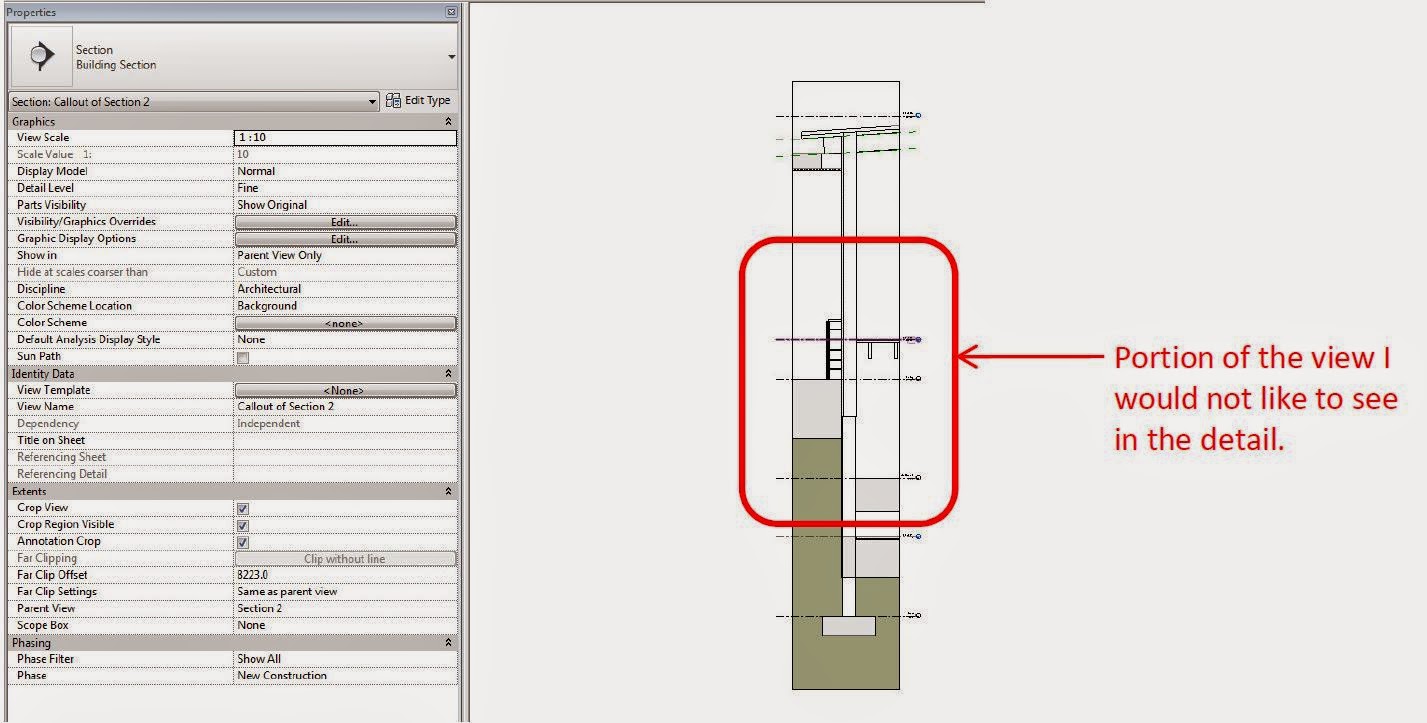
When you are creating details for your Revit project, you often find yourself in a situation where you want to create a full wall detail, without showing the boring bits in the middle.


Any view you have in Revit gives you the opportunity to split the view and not display pieces of the image.


To enable this view splitting, ensure that the view crop region is active and the Crop Region is visible. (In Properties)


If you select the crop outline of the view you will notice some break symbols on the vertical and horizontal edges. These are the ‘View Breaks’. If you select either of these symbols it will remove a portion of the view.


The gap is not how you would like the finished view to be represented, so if you select the crop region again, you have some movement arrows to adjust the crop regions into position by selecting and dragging.


The views can be amalgamated again by dragging them on top of one another, thus undoing the view break.

Hide at Scales Coarser Than

When you are creating views in your model, to ensure that you don’t have your section, elevation and callout markers appearing everywhere and on all of your views, an easy way of filtering out some of the markers is adjust the ‘Hide at scales coarser than’ parameter.


This parameter will allow the View markers to be hidden at larger scale views than the number specified, for example setting it up so that you don’t get your 1:10 views showing on your 1:100 plans.

Section Box Adjusting

The Section Box is a fantastic tool in Revit to create an isolated 3D model of elements in your project. If you are using an orthographic 3D view of you model the section box is fairly easy to control by using the grip arrows to drag in and out. In some perspective views it can be harder to adjust the section box.

Irrespective of you view type, if you need to fine tune the section box in a view you can open up floor plan view of you model and if you right click on the 3D view you would like to adjust there is an option to ‘Show Section Box’. This will show the outline of the Section Box and can be adjusted in the plan.


Remember about the Auto-Section Box Addin, a real time saver!!!